Materials

Plugins:
Andromeda / Design
FM tiles tools / Blend Emboss
Toadies / sucking toad
Bevel II.2 /
What are you?
Simple /
Half Wrap
Preparations:
Double Click on the Eye Candy Preset,
it will be imported automatically
Copy the selection files to the selection folder of PSP
Download Preset Emboss3
HERE
- Copy it to the Preset folder of PSP
Used Colors
Foregroundcolor:
#777569
Backgroundcolor:
#b6d5d6
Other: #ffffff
This translation is
written with PSP13
but can also be made
with earlier PSP
versions.
Tube by
K@rine Dreams. She shares her great tubes
HERE
Tube by Kitty from
A&K Tubes unlimited. She shares her great tubes
HERE
~°~°~°~°~
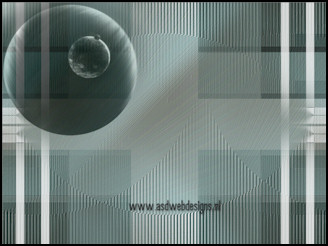
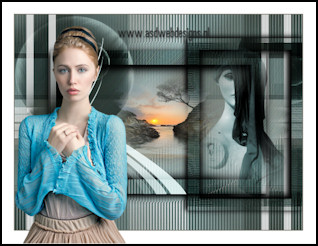
01.
Open a
new transparent image of 800 x 600 px
Set your foregroundcolor to
Foreground/Background Gradient (Corel_06_029) - Style: Radial
Fill your image with the Gradient
Adjust - Blur - Gaussian Blur -
20
Effects - Artistic Effects -
Topography
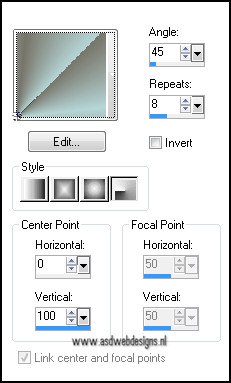
Effects - Plugins -
Andromea - Design
Effects - Image Effects - Seamless
Tiling
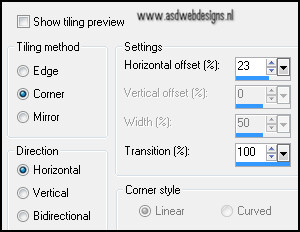
Effects - Image Effects - Seamless
Tiling
Effects - Plugins -
FM Tile tools -
Blend Emboss -
Default settings
Repeat once
02.
Layers - Duplicate
Image - Resize - 60% - Resize all
layers not checked
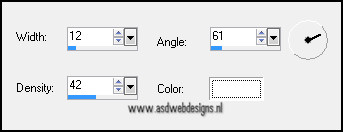
Effects - Plugins -
Toadies -
sucking toad
Bevel II.2

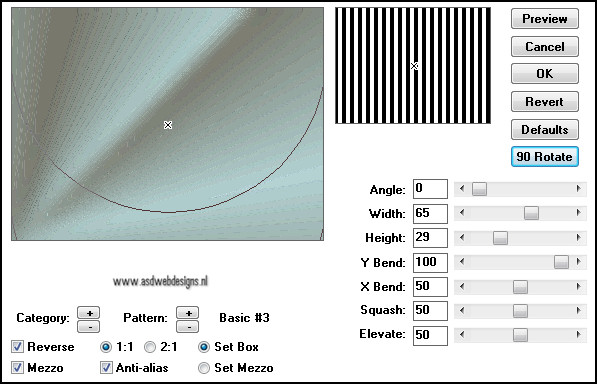
Effects - Plugins -
Simple - Half Wrap -
Default
Effects - Plugins -
Toadies - What are
you?

Layer Palette - Set the Blend Mode
of this layer to "Multiply"
Effects - Edge Effects - Enhance
03.
Layers - New Raster Layer
Selections - Load/Save Selection -
Load selection from disc - "nicole-100"
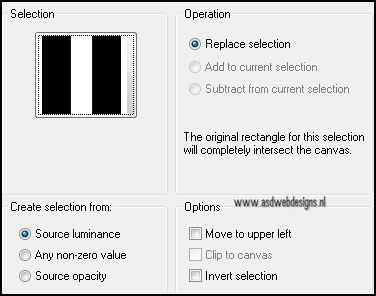
Fill with #ffffff
Selections - Modify - Contract - 20 px
Hit the delete key of your keyboard
Selections - Select None
Effects - User Defined Filter -
Preset Emboss3
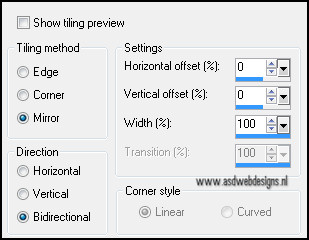
Effects - Image Effects - Seamless
Tiling

Effects - Plugins -
Toadies - What
are you?

Effects - Edge Effects - Enhance
Layer Palette - Set the Blend Mode
of this layer to "Luminance"
Selection Tool -
Rectangle - Custom
Selection:

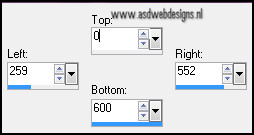
Hit the delete key of your keyboard
Selections - Select None
04.
Open Tube "calguisuniverse280211" -
Copy and paste as new layer on your image.
Image - Resize - 60% - Resize all
layers not checked
Image - Resize - 85% - Resize all
layers not checked
Image - Flip
Layer Palette - Set the Blend Mode
of this layer to "Luminance (Legacy)" and the Layer Opacity to
70
Move to the left
top corner:
Layers - Arrange - Move Down -
Repeat once
Layers - Merge - Merge Visible
05.
Selection Tool -
Rectangle - Custom
Selection:
Selections - Promote
selection to layer
Layer Palette - Set the Blend Mode
of this layer to "Multiply"
Effects - Edge Effects - Enhance
Selections - Modify - Contract - 40 px
Hit the delete key of your keyboard
Effects 3D Effects - Cutout

Selections - Select
none
Effects - Plugins -
Alien Skin Eye Candy 5 -
Impact - Perspective Shadow
-
Settings Tab:
Preset Nicole-5
06.
Layers - Duplicate
Image - Resize - 80% - Resize all
layers not checked
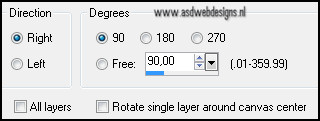
Image - Free Rotate
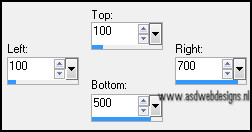
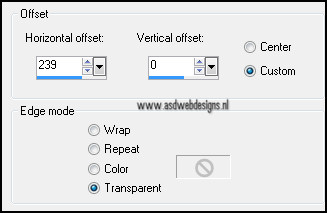
Effects - Image Effects - Offset
07.
Layers - New Raster Layer
Selections - Load/Save Selection -
Load selection from disc -
nicole-98 - Same settings as before
Open Tube "Sunset_CibiBijoux" - Copy and paste into the selection
Selections - Select
none
08.
Layers - New Raster Layer
Selections - Load/Save Selection -
Load selection from disc -
nicole-97 - Same settings as before
Open Tube "Kittys-Never-Mind-Image_1[1]" - Copy and paste into the selection
Adjust - Hue and Saturation -
Colorize - 130 - 45
Selections - Select
none
09.
Layers - New Raster Layer
Selections - Load/Save Selection -
Load selection from disc -
nicole-96 - Same settings as before
Fill with #b6d5d6
Selections - Select None
Effects - User Defined Filter -
Preset Emboss3
Layer Palette - Set the Blend Mode
of this layer to "Screen"
Layers - Duplicate
Layer Palette - Set the Layer
Opacity of this layer to 65
10.
Image - Add Borders - Symmetric -
2 px - #777569
Image - Add Borders - Symmetric -
35 px - #ffffff
11.
Open Tube "k@rine_ dreams
_Pretty_Woman1236_septembre_2010" - Copy and paste as new
layer on your image.
Image - Resize - 80% - Resize all
layers not checked
Move to the left
like this:
Effects 3D Effects - Dropshadow -
2 - 4 - 100 - 20 - #777569
Image - Add Borders - Symmetric -
2 px - #777569
12.
Add your name or watermark, save as
JPG file and you're done!
Thank you Julie and Keitha for testing this translation!
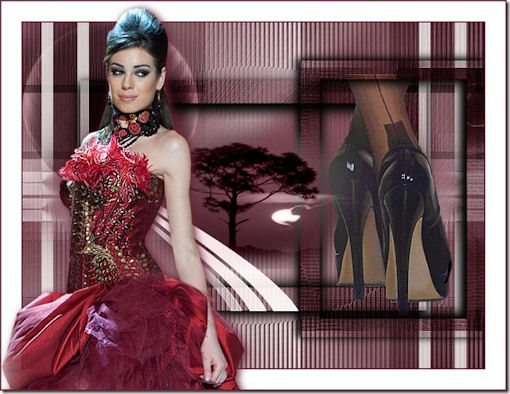
Made by Julie:
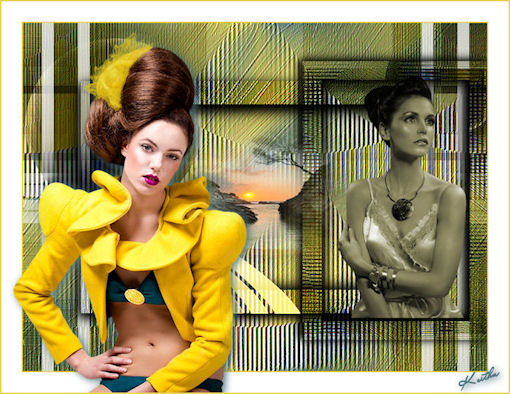
Made by Keitha:
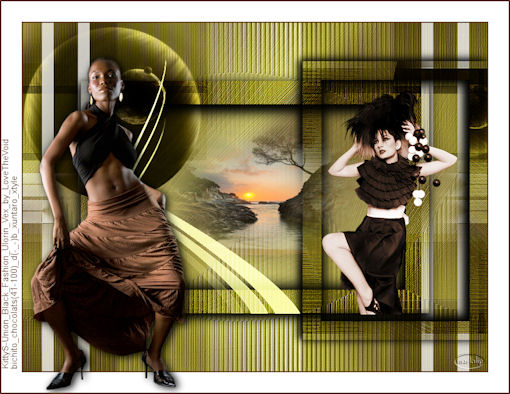
Made by Martalip:
Back
to the top
Home ASDwebdesigns
